10 KiB
Battleship Game
This is a simple command-line Battleship game written in Python, with a leader board stored in a google docs spreadsheet.
Contents
Click here for Table of Contents
Screenshots
| Heroku Deployed App |
|---|
 |
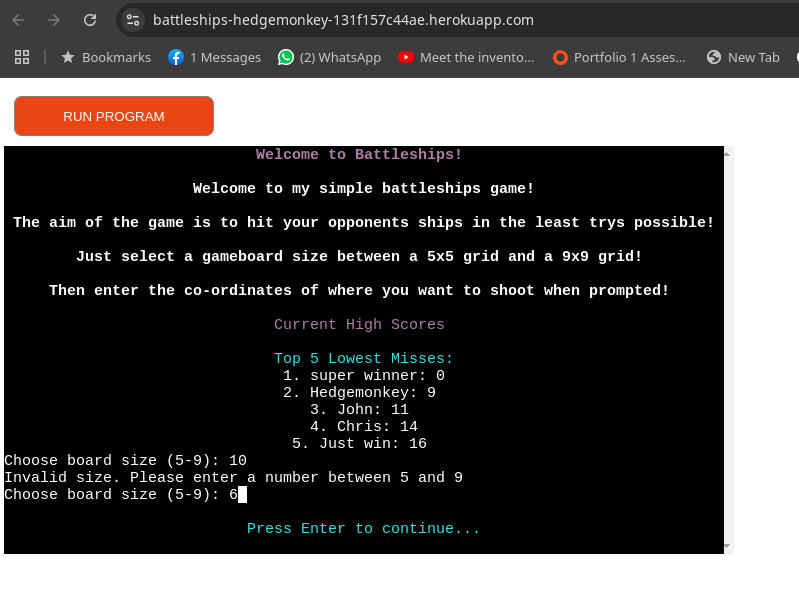
| This is the app showing the Welcome screenwith Leaderboard with scores sourced through Google Docs API |
Flow Chart Screenshots
| Flow Chart Screenshot |
|---|
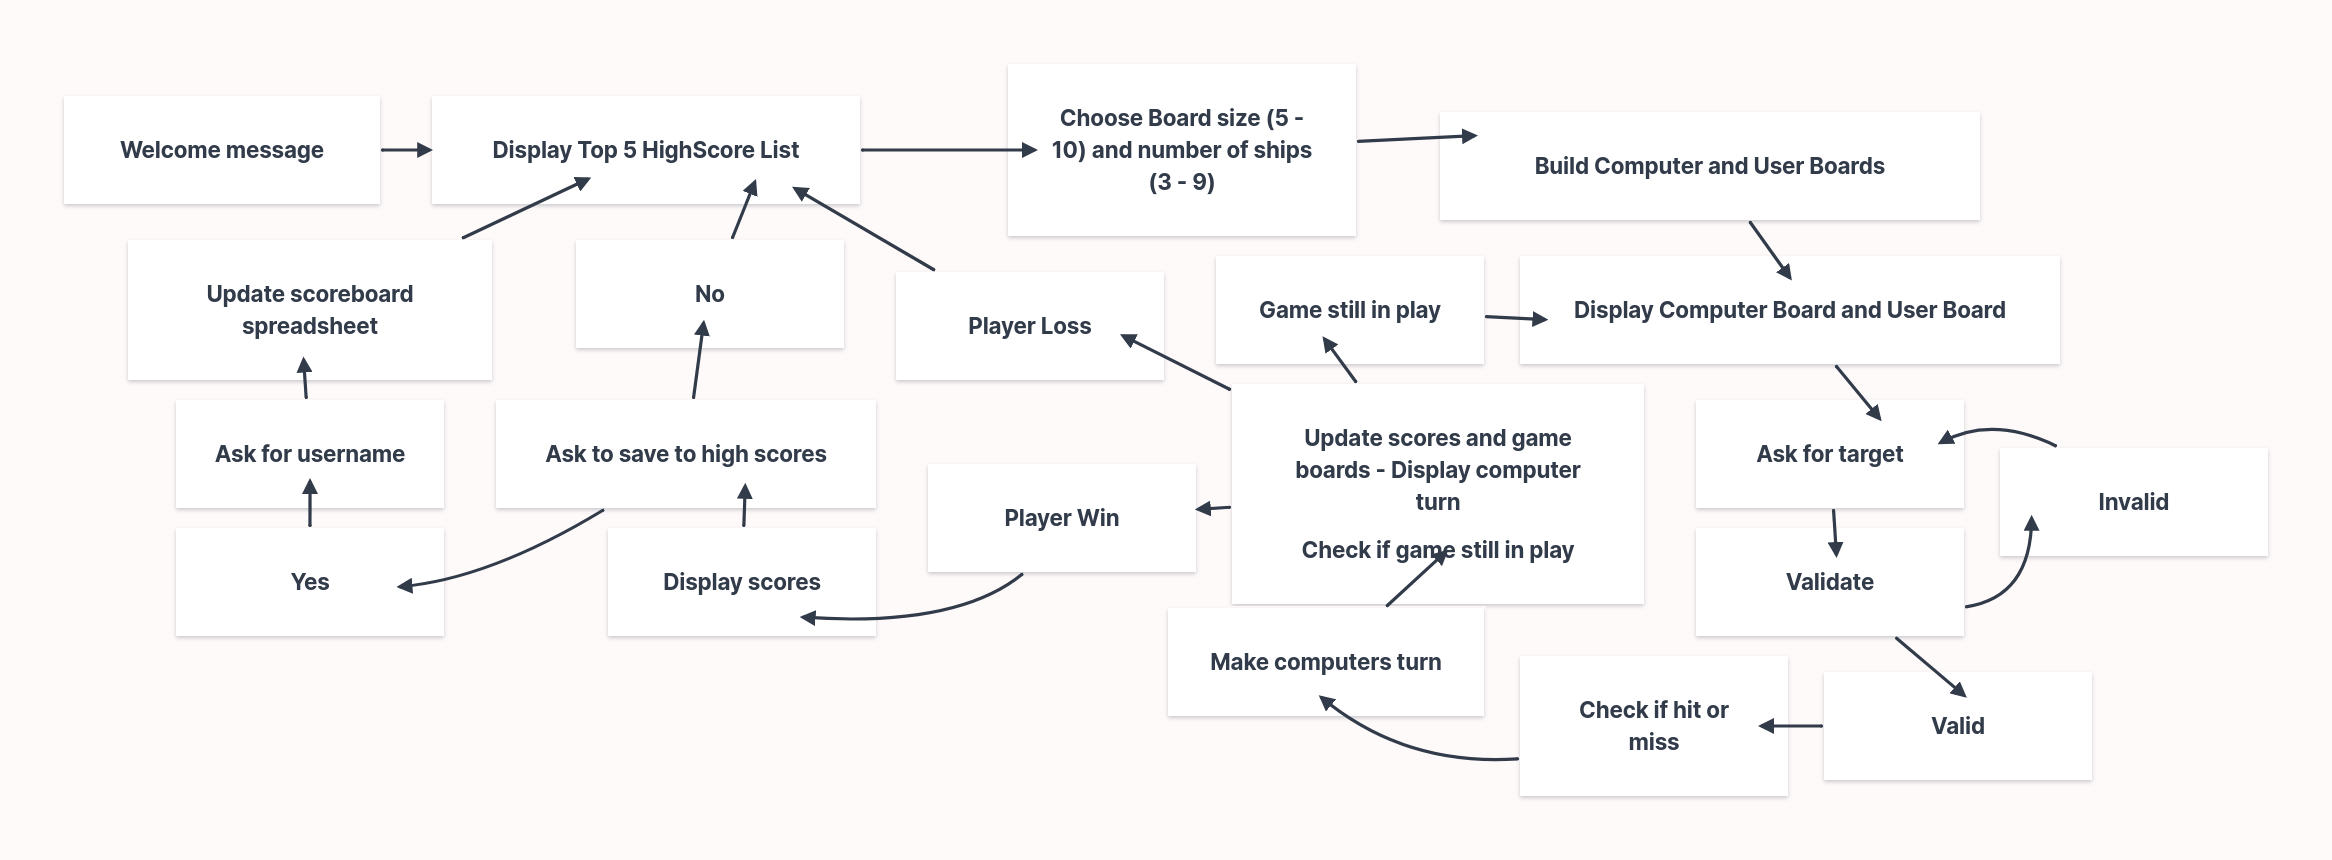 |
| This is a rough flow chart displaying the program processes made using Milanote |
Features
- Player vs. Computer: Play against a challenging AI opponent.
- Multiple Board Sizes: Choose a board size between 5x5 and 9x9.
- High Scores: Track your best scores and compare them to others.
- Colorful Interface: Enjoy a visually enhanced gameplay experience with colored console output.
- Leaderboard: Top scores saved to a Google sheets leaderboard using
Google Docs APIandgspread
Testing
Replit
Most of this project was developed using Replit and so testing was done as I was building the project step by step.
Manual Testing
The following manual tests were conducted to ensure the application works as expected:
Test 1: Welcome Message
Steps:
- Run the application.
- Observe the welcome message displayed in the console.
Expected Result:
- The welcome message should be centered and displayed with appropriate colors.
Actual Result:
- The welcome message is displayed correctly.
Test 2: High Scores Display
Steps:
- Run the application.
- Observe the high scores displayed after the welcome message.
Expected Result:
- The high scores should be displayed in a centered format with appropriate colors.
Actual Result:
- The high scores are displayed correctly.
Test 3: Board Size Input
Steps:
- Run the application.
- Enter a valid board size (between 5 and 9).
Expected Result:
- The application should accept the input and proceed to the next step.
Actual Result:
- The application accepts valid inputs and proceeds correctly.
Test 4: Invalid Board Size Input
Steps:
- Run the application.
- Enter an invalid board size (outside the range of 5 to 9).
Expected Result:
- The application should display an error message and prompt for input again.
Actual Result:
- The application displays an error message and prompts for input again.
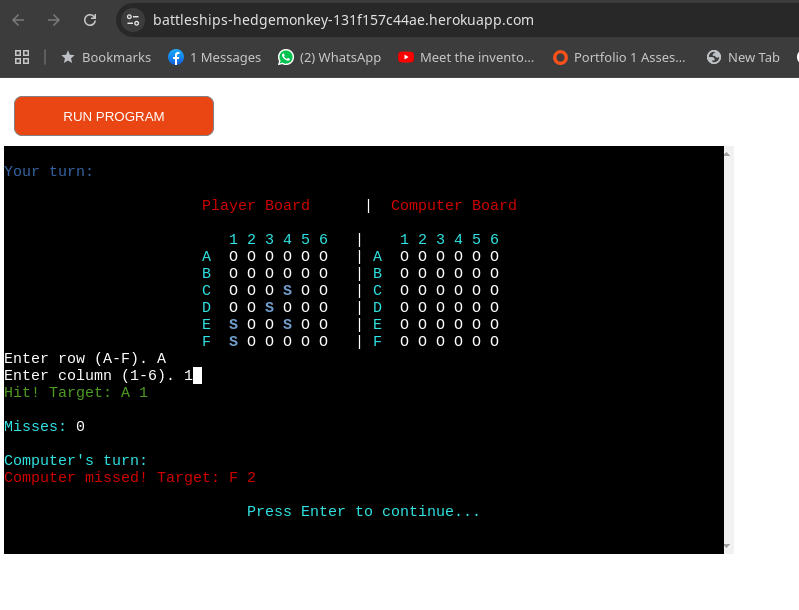
Test 5: Player Turn
Steps:
- Run the application.
- Enter valid coordinates for the player's turn.
Expected Result:
- The application should update the board and display the result (hit or miss).
Actual Result:
- The application updates the board and displays the result correctly.
Test 6: Computer Turn
Steps:
- Run the application.
- Observe the computer's turn.
Expected Result:
- The application should update the board and display the result (hit or miss).
Actual Result:
- The application updates the board and displays the result correctly.
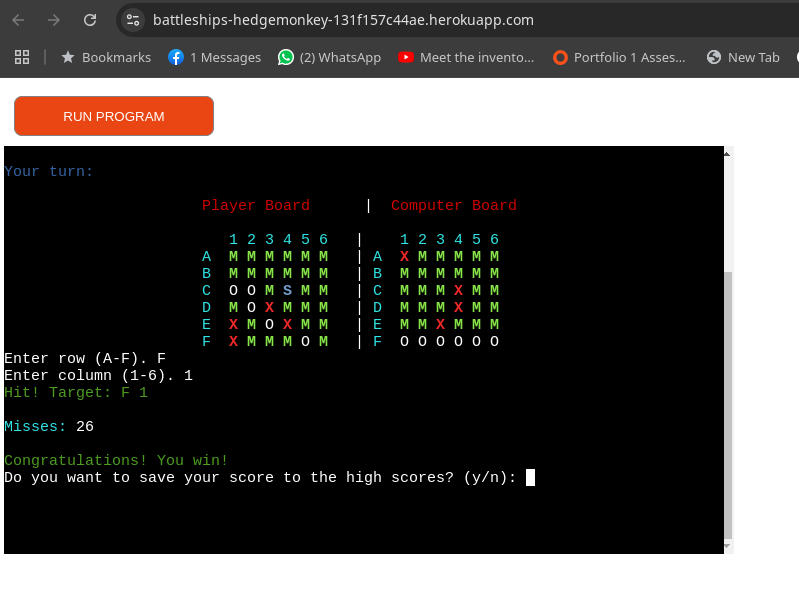
Test 7: Game Over
Steps:
- Run the application.
- Play the game until either the player or the computer wins.
Expected Result:
- The application should display the game over message and the final scores.
Actual Result:
- The application displays the game over message and the final scores correctly.
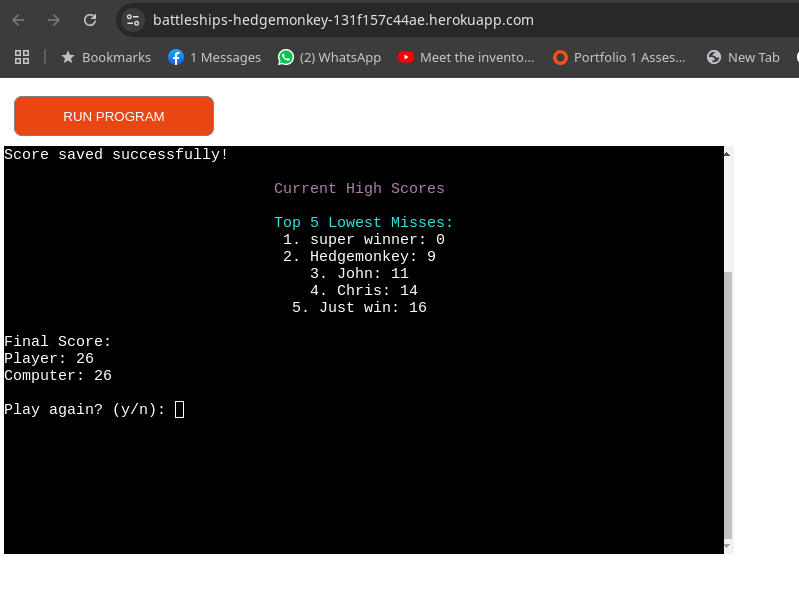
Test 8: Save High Score
Steps:
- Run the application.
- Win the game and choose to save the high score.
- Enter a name when prompted.
Expected Result: The application should save the high score to the Google Sheets and display a success message.
Actual Result: The application saves the high score and displays the success message correctly.
Empty Username: Players can intentionally leave the username field empty if they prefer not to submit a name. The high score will still be recorded on the leaderboard with a blank entry for the name.
PEP 8 Compliance
The project's Python code has been refactored to improve adherence to PEP 8 style guidelines. This enhances readability and maintainability. Specific improvements include:
- Reduced Branching: Complex conditional logic, particularly in the
display_boardsfunction, has been simplified to reduce the number of branches, improving code clarity. - Modernized String Formatting: F-strings (formatted string literals) have been adopted throughout the codebase for more concise and readable string formatting.
- Removed Redundant Code: Unnecessary
elseclauses followingreturn,break, andcontinuestatements have been eliminated. - Import Order: Imports have been reorganized to follow PEP 8 recommendations (standard library imports first, followed by third-party and then local imports).
These changes were guided by feedback from the pylint static analysis tool.
Future
Potential Future Features
- Player vs. Player: Perhaps add functionality to allow for a 2 player turn-based mode
- Various Ship Sizes: It would be nice to add different dized ships more akin to traditional Battleships game, with a choice of orientation
- Number of Ships: The added functionality to not only choose the board size but to also choose how many ships on the board would also be an attractive addition to the game
- Choose Ship Placement: The option to decide where you would like to place your ships on the board would also be a nice future feature to incorporate
Deployment
The site was deployed to Heroku. The steps to deploy are as follows:
- Set up a Heroku Account and create a new App
- In Settings add the python and nodejs buildpacks
- In
Settings > Config VarsAdd the creds.json contents under the variableCREDS - Link the GitHub repository to the Heroku app.
Heroku git URL [https://git.heroku.com/battleships-hedgemonkey.git]
The live link can be found here
Google Docs
This project uses a Google Sheets spreadsheet hosted on Google Docs accessed by Google Cloud API this is to keep track of past scores.
In order to deploy this yourself you would have to get the correct credentials to access this file or specify your own spreadsheet and provide your own Google Cloud API Credentials
To do this you ned to save your own credentials to creds.json and change the line SHEET = GSPREAD_CLIENT.open('battleship_scores').sheet1 replacing battleship_scores with your own spreadsheet filename
The spreadsheet can be access HERE
Local Deployment
You can clone or fork this project to make a local copy on your system.
Cloning
You can clone the repository by following these steps:
- Go to the GitHub repository.
- Locate the Code button above the list of files and click it.
- Select if you prefer to clone using HTTPS, SSH, or GitHub CLI and click the copy button to copy the URL to your clipboard.
- Open Git Bash or Terminal.
- Change the current working directory to the one where you want the cloned directory.
- In your IDE Terminal, type the following command to clone my repository:
git clone https://github.com/hedgemonkey/battleships.git
- Press Enter to create your local clone.
Forking
By forking the GitHub Repository, we make a copy of the original repository on our GitHub account to view and/or make changes without affecting the original owner's repository. You can fork this repository by using the following steps:
- Log in to GitHub and locate the GitHub repository.
- At the top of the Repository (not the top of the page) just above the "Settings" Button on the menu, locate the "Fork" Button.
- Once clicked, you should now have a copy of the original repository in your own GitHub account.
Local vs Deployment
There are no notable differences between my locally developed app and the Heroku deployed site aside from slight variances in the terminal colours.
Credits
In this section, I will reference the sources of my content and media, full disclosure of any resources used shall be detailed here.
-
Milanote used to create Flow Chart Diagram
-
Gemini Pro AI Used to help guide me when code wasn't doing as I intended
Content
Acknowledgements
- I would like to thank the Code Institute Slack community for the moral support and general information that helps with my studies.
- I would like to also thank Gemini Pro AI for assisting me whenever I needed a bit of quick advice, although it's suggestions often lead to more complications it's explinations and tips were incredibly helpful
- YTMusic for providing me with a soundtrack to work to

